Taking screenshots on Windows is something almost every user does at some point, whether to save an error message, share part of a document, keep proof of an online payment, prepare study materials, or explain something to another person visually instead of typing long messages.
For many people, the only known option is pressing the Print Screen key, which technically works but often creates confusion because nothing seems to happen, the image is copied but not saved, and the result does not always match what the user actually wanted to capture.
This guide on how to capture screen on Windows was designed for users who want more control, better results, and simpler workflows, presenting all the native Windows screenshot methods in a didactic, visual, and step by step way.
Throughout this article, you will learn how screenshots work on Windows, how to use keyboard shortcuts effectively, how to capture full screens, specific windows, or selected areas, how to use built in tools like Snipping Tool, how to save and organize screenshots properly, and how to apply these captures in real situations related to work, study, and daily life.
The goal is to move beyond the basic Print Screen habit and give you confidence to choose the best screenshot method for each situation.
Understanding What a Screenshot Is and Why It Is Useful
A screenshot is an image that represents exactly what is shown on your screen at a specific moment, capturing windows, menus, text, images, and layouts just as they appear.
This visual snapshot can then be saved, edited, shared, or referenced later.
Common Reasons People Take Screenshots
- Saving important information.
- Sharing instructions visually.
- Recording errors or problems.
- Creating study material.
- Supporting work reports.
Screenshots often communicate faster than text.
The Problem With Only Using Print Screen
The Print Screen key has existed for decades, yet many users find it confusing because it does not always save the image automatically or show feedback that something was captured.
Understanding how Print Screen actually works helps explain why better alternatives exist.
What Happens When You Press Print Screen
- The screen image is copied to the clipboard.
- No file is saved automatically.
- You must paste it somewhere manually.
This behavior often surprises beginners.
Different Ways to Capture Screen on Windows
Windows offers several built in methods to capture the screen, each designed for a different use case.
Knowing these options allows you to choose the fastest and most practical approach every time.
Main Screenshot Methods on Windows
- Print Screen variations.
- Snipping Tool.
- Snip and Sketch shortcut.
- Automatic save shortcuts.
Each method has advantages.
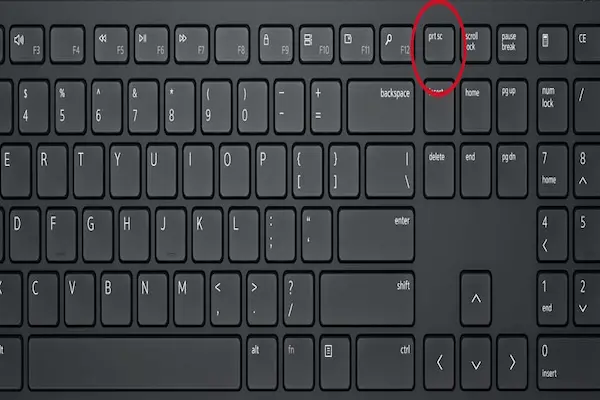
Using the Print Screen Key Variations
Although basic, Print Screen has variations that improve usability.
Print Screen Alone
- Captures the entire screen.
- Copies image to clipboard.
You must paste the image into another program.
Alt + Print Screen
- Captures only the active window.
- Copies it to clipboard.
This avoids capturing unnecessary background.
Windows Key + Print Screen
- Captures the entire screen.
- Saves automatically as an image file.
This is one of the most useful shortcuts.
Where Windows Saves These Screenshots
- Pictures folder.
- Screenshots subfolder.
Knowing the location saves time.
Understanding Clipboard Versus Saved Screenshots
The clipboard is a temporary storage area that holds copied content.
If you copy a screenshot but do not paste it, it will be replaced by the next copied item.
Clipboard Screenshot Workflow
- Capture screen.
- Open an app like Paint or Word.
- Paste the image.
- Save the file manually.
This method works but involves more steps.
Introducing Snipping Tool: A More Flexible Option
Snipping Tool is a built in Windows app designed specifically for screenshots.
It offers more control than Print Screen.
Why Snipping Tool Is Useful
- Select specific areas.
- Capture windows easily.
- Delay captures if needed.
This tool suits precise captures.
How to Open Snipping Tool
Common Ways to Access
- Search for Snipping Tool.
- Pin it to the taskbar.
Keeping it accessible improves workflow.
Snipping Tool Capture Modes Explained
Snipping Tool offers multiple capture modes.
Available Modes
- Free form snip.
- Rectangular snip.
- Window snip.
- Full screen snip.
Each mode serves a different purpose.
Rectangular Snip
- Select a specific area.
- Most commonly used option.
Window Snip
- Capture one application window.
- Clean and focused result.
Using Snip and Sketch Shortcut
Modern Windows versions include a fast shortcut that combines speed and flexibility.
Windows Key + Shift + S
- Dims the screen.
- Lets you choose capture type.
- Copies image to clipboard.
This shortcut is extremely popular.
Capture Options With This Shortcut
- Rectangular area.
- Free form selection.
- Window capture.
- Full screen.
Selection appears instantly.
Saving Screenshots After Using Snip and Sketch
After capturing, a notification usually appears.
Saving Steps
- Click the notification.
- Review the image.
- Save to desired folder.
You can rename files immediately.
Annotating Screenshots for Work and Study
Snipping Tool allows basic annotations.
Useful Annotation Features
- Pen tool.
- Highlighter.
- Crop tool.
Annotations clarify information.
Best Screenshot Methods for Common Situations
Capturing an Error Message
- Use Window snip.
- Avoid full screen clutter.
Capturing Study Material
- Use Rectangular snip.
- Highlight key sections.
Capturing Full Pages or Dashboards
- Use Full screen capture.
- Check resolution afterwards.
Organizing Screenshots Properly
Unorganized screenshots quickly become clutter.
Suggested Folder Structure
- Screenshots
- Work.
- Study.
- Personal.
Organization saves future time.
Renaming Screenshot Files Clearly
Default names are not descriptive.
Better Naming Examples
- invoice_payment_march.png
- study_notes_chapter3.png
Clear names help searching.
Understanding Image Formats
Screenshots are usually saved as PNG or JPG.
PNG Versus JPG
- PNG keeps text sharp.
- JPG uses less space.
PNG is usually recommended.
Keyboard Shortcuts Summary
Most Useful Shortcuts
- Print Screen.
- Alt + Print Screen.
- Windows + Print Screen.
- Windows + Shift + S.
Memorizing one or two is enough.
Common Mistakes When Taking Screenshots
- Capturing too much information.
- Forgetting to save clipboard images.
- Leaving screenshots unnamed.
- Sharing sensitive information.
Awareness prevents issues.
Privacy and Safety Considerations
Screenshots can include sensitive data.
Before Sharing a Screenshot
- Check for personal details.
- Blur sensitive areas if needed.
Privacy should always come first.
Using Screenshots for Communication
Screenshots are powerful communication tools.
Practical Uses
- Explaining steps visually.
- Reporting issues.
- Supporting instructions.
Visuals reduce misunderstandings.
Practice Exercises to Build Confidence
Exercise 1: Full Screen Capture
- Use Windows + Print Screen.
- Find the saved image.
Exercise 2: Area Capture
- Use Windows + Shift + S.
- Select a small area.
- Save it.
Exercise 3: Organize Screenshots
- Create folders.
- Move screenshots.
Practice makes everything easier.
Frequently Asked Questions About How to Capture Screen on Windows
Why does nothing happen when I press Print Screen?
The image goes to clipboard.
Which method is best for beginners?
Windows + Shift + S is very intuitive.
Can I undo a screenshot?
You can delete it like any file.
Final Thoughts and a Practical Next Step
Learning how to capture screen on Windows goes far beyond knowing the Print Screen key, because the system offers several native tools that are faster, clearer, and much more flexible for real world needs.
When you understand the different shortcuts, use Snipping Tool or Snip and Sketch for precise captures, and organize screenshots properly, capturing your screen becomes a natural and efficient part of your digital routine.
Could you try right now by using Windows key plus Shift plus S to capture a small part of your screen and save it in an organized folder, just to experience how much easier this method feels compared to the old Print Screen habit?