You will also find that the article repeats important safety reminders in different ways, uses long sentences that give context, and relies on numbered steps and bulleted lists so even beginners can follow the instructions without hesitation.
Many Android users live with the constant fear that if their phone breaks, gets stolen, or suddenly refuses to charge, every photo stored inside it could disappear forever, and that fear is completely understandable because, for most people, the photos in their gallery represent years of meaningful moments, irreplaceable family images, travel memories, and snapshots of everyday life that they genuinely value.
As a result, the idea of learning how to back up photos can feel overwhelming, especially when you hear unfamiliar terms like “sync,” “cloud,” or “local backup,” and when settings menus seem different from phone to phone.
This guide takes a calm and careful approach that walks you through everything step by step, explaining what each button does, showing how to check whether your backup is active, describing alternatives such as cable-based backups, and offering a safety checklist so you feel completely confident that your memories are protected before deleting anything from your device.
1. Understand What “Backing Up Android Photos” Really Means
Before turning on any backup setting, it helps to understand what a backup actually does, because once you realize how it works, you gain the confidence to trust the process rather than worrying about losing important files.
A Backup Does Three Things:
-
Creates a copy of your photos outside your phone so they remain safe if your device breaks.
-
Keeps the copies updated automatically whenever new photos are added.
-
Allows you to restore or access your images from another device or after replacing your phone.
Why Backups Matter So Much
-
Phones fail unexpectedly. Batteries swell, screens crack, and hardware can die without warning.
-
Phones get lost or stolen. A backup ensures your photos remain safe even if the phone itself disappears.
-
Repairs sometimes erase data. If the phone needs a factory reset, photos stored only on the device could vanish.
-
Memory fills up quickly. Backup tools help free space by moving older photos safely to the cloud.
Once you know this, backups stop feeling like a technical chore and begin feeling like a simple insurance policy that protects your memories.
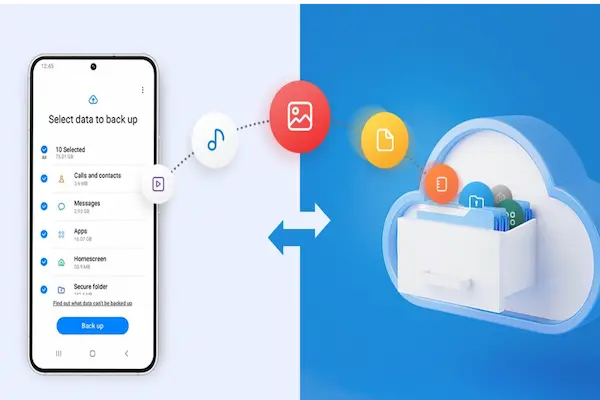
2. Check Whether Your Android Photos Are Already Backed Up
Many Android phones already have Google Photos backup enabled, and countless people never realize it because the setup may have been activated automatically during the phone’s first configuration. Therefore, it is essential to confirm whether your photos are already syncing before changing anything.
How to Check If Backup Is Active (Without Screenshots, Using Text Descriptions)
-
Open the Google Photos app.
You will see your photos arranged in a grid; this is your main gallery inside the app. -
Look at the top of the screen.
If you see a message like “Backup complete,” “Backup on,” or a cloud icon that appears filled or active, your photos are likely already backed up. -
Tap your profile icon in the top-right corner.
A menu will appear showing your account details and backup status. -
Find the line labeled “Backup.”
-
If it says On, backup is enabled.
-
If it says Off, synchronization is not active yet.
-
If it says Waiting for Wi-Fi, the backup will resume when connected to a wireless network.
-
-
Check the progress if backup is running.
You may see messages such as “Backing up 324 items” or “Preparing backup.”
This means content is uploading and should not be interrupted.
Safety Note
If backup is disabled and you have thousands of photos, you should turn it on only when you have:
-
A stable Wi-Fi connection
-
Sufficient battery or a charger plugged in
-
Time to let the phone upload without interruption
Backing up a full gallery may take minutes or several hours depending on your connection speed.
3. Turn On Google Photos Backup (The Easiest and Safest Method)
Google Photos remains the most common way to back up pictures on Android because it works seamlessly across brands, updates automatically, and restores easily when you change phones.
How to Enable Backup in Google Photos
-
Open Google Photos.
-
Tap your profile picture in the top-right corner.
-
Select Photos settings.
-
Tap Backup.
-
Turn the toggle On.
What Happens After Turning It On?
Once backup is enabled:
-
Every new photo you take will upload automatically.
-
The process runs quietly in the background.
-
You can close the app and the sync continues.
-
If your phone is on low battery, it may pause to save energy.
-
If your connection is slow, the process may take time but will continue when possible.
Choose Backup Preferences
You may see settings such as:
-
Backup using Wi-Fi only
-
Backup using Wi-Fi or mobile data
-
Backup device folders (screenshots, downloads, messaging app images)
Turning on device folder backup ensures images from other apps—like downloaded files or messaging photos—also become safe.
4. Understand What Gets Backed Up and What Does NOT
Users often assume everything inside Google Photos is automatically protected, but there are exceptions, so clarity saves frustration later.
Google Photos Backups Include:
-
Photos you take with the camera
-
Videos recorded on your device
-
Screenshots
-
Images saved from apps (if you enabled device folder backup)
-
Edited versions of photos inside Google Photos
Google Photos Does NOT Back Up:
-
Images stored inside private app folders not selected
-
Files in temporary or cache folders
-
Photos deleted before the backup completes
-
Photos inside third-party apps that block access
A Helpful Rule
If you see the photo inside Google Photos, and a small cloud icon appears on it or the backup status says “Complete,” it is backed up.
5. Back Up Photos Using a USB Cable (Offline Option)
Some people prefer not to use cloud storage at all, or they want an additional backup just to be safe. Cable backup is perfect for that.
How to Back Up Photos to a Computer
-
Use a USB cable to connect the phone to the computer.
-
Unlock the phone and select File Transfer mode if prompted.
-
Open the phone’s storage from your computer.
-
Open the folder labeled DCIM, which contains camera photos.
-
Copy the folders (such as “Camera”) to a folder on your computer.
-
Wait for the transfer to finish completely.
-
Check that images open correctly on the computer before deleting anything from the phone.
Advantages of Cable Backup
-
No internet required
-
Fast transfer speeds
-
Unlimited storage depending on your computer
-
Extra safety layer beyond the cloud
Disadvantages
-
Requires occasional manual action
-
Must stay organized or backups become messy
-
Does not help with automatic daily protection
Both cloud and cable methods can be combined for maximum safety.
6. Ensure Your Backup Doesn’t Stop Unexpectedly
Even with automatic backups, small issues such as low storage, slow Wi-Fi, or a disabled setting can stop synchronization quietly. The following habits prevent those surprises.
Common Reasons Backup Pauses
-
Phone battery below 15%
-
No Wi-Fi connection if “Wi-Fi only” backup is enabled
-
App needs an update
-
Not enough cloud storage available
-
Power-saving mode blocking background activity
Simple Fixes
-
Plug the phone into power
-
Connect to a stable Wi-Fi network
-
Open Google Photos to force a refresh
-
Check cloud storage and free space if needed
-
Turn off aggressive battery-saving modes temporarily
7. Verify Your Backup Is Working (Critical Step)
Before deleting anything or relying on the cloud as your main photo archive, you must confirm that your photos truly exist in your backup.
Verification Checklist
-
Open Google Photos on another device or browser
If you see your photos there, the backup is confirmed. -
Turn off your phone’s internet and open Google Photos
If some photos still load with a lightning-fast preview but say “Not backed up,” it means those images need more time. -
Check the Backup Status Message
It should say:-
“Backup complete,” or
-
“Everything is backed up”
-
-
Look for the Cloud Icon on Photos
-
Cloud with a checkmark = backed up
-
Cloud with arrows = uploading
-
No cloud icon = not synced
-
-
Verify videos too, since they upload more slowly.
Confidence Tip
Many people feel relieved when they realize that verification is simple and quick, giving them reassurance that their memories are truly safe.
8. Free Up Space After Backup (Optional but Helpful)
Once everything is backed up, many Android users like to free space from the phone so it runs faster.
Safe Ways to Free Space After Backup
-
Delete photos already backed up (Google Photos has a feature that removes local copies only).
-
Remove old videos that are already synced.
-
Clear messaging app folders containing forwarded memes and images.
-
Clean up screenshots you no longer need.
Warnings
Before freeing space:
-
Make sure the backup says “Complete.”
-
Never delete from the phone unless you confirmed the copy exists elsewhere.
-
Be cautious when removing entire albums unless you are absolutely sure they are stored in the cloud.
9. Wi-Fi Tips for Faster, Safer Backup
Backup speed depends heavily on internet quality.
To Improve Upload Speed
-
Stay close to the Wi-Fi router.
-
Avoid backing up while streaming videos.
-
Plug the phone into a charger so it doesn’t pause.
-
Prefer 5 GHz Wi-Fi for faster upload speeds.
-
Let the phone sit idle so the process continues smoothly.
10. A Simple Monthly Backup Routine to Keep Memories Safe
A predictable routine ensures all new photos continue to be backed up.
Monthly Tasks
-
Open Google Photos and check backup status.
-
Connect to Wi-Fi and let the app sync any pending images.
-
Clean up the Downloads folder.
-
Review messaging folders for unnecessary saved photos.
-
Check cloud storage levels.
-
Make an optional cable backup for important events (vacations, family gatherings).
Quarterly Tasks
-
Review your albums and organize key memories.
-
Delete blurry or duplicate photos.
-
Export important videos to an external drive as an additional layer of protection.
11. Quick Summary Checklist (Save or Print)
Before Backup
-
Phone unlocked
-
Wi-Fi connected
-
Battery above 20%
-
Google Photos updated
Backup Steps
-
Turn on Google Photos backup
-
Enable device folder backup if desired
-
Wait for upload to finish
-
Verify photos appear in backup location
After Backup
-
Optionally free storage
-
Set monthly backup check reminders
-
Keep cable backup for extra safety
Final Thoughts
Backing up your Android photos does not need to be confusing, risky, or technical, especially when approached with slow and deliberate steps that build your confidence, protect your memories, and eliminate the constant fear that something might happen to your phone. By learning how backup works, verifying every step, and creating a simple routine that becomes second nature, you ensure that every photo—whether a once-in-a-lifetime memory or a spontaneous snapshot—is stored safely in a place you can rely on.