Many new iPhone users discover that although they use their camera constantly and accumulate thousands of personal photos, screenshots, and videos, they have never taken the time to understand how backups work, which creates a lingering fear that if something goes wrong with the phone, all those memories might disappear forever; therefore, this guide aims to remove that fear by offering a slow-paced, friendly, and carefully detailed explanation of every step involved in turning on iCloud Photos, checking your Apple ID, reviewing your storage capacity, and confirming that the backup is actually working as intended.
You will also find that this guide includes long descriptive sentences that approach each concept from multiple angles, numerous numbered and bulleted lists that gradually build clarity, and screen-by-screen explanations so even someone who has never opened the iCloud menu before can follow along with total confidence.
1. Understanding What an iPhone Photo Backup Actually Does
People often feel confused about what iCloud Photos really is, and because of that confusion, many worry that turning it on might delete images or change something unexpectedly. A clear explanation makes everything easier.
What iCloud Photos Does
-
Creates an online copy of your entire photo library, including photos, screenshots, edited versions, videos, and albums.
-
Keeps every new photo synced automatically, which means you never again need to remember to back something up manually.
-
Allows access to your photos from any Apple device once signed in with the same Apple ID.
-
Restores your complete library when you upgrade or replace your iPhone.
What iCloud Photos Does NOT Do
-
It does not store photos only on the cloud unless you choose the storage-saving option.
-
It does not back up photos outside the Photos app unless those images were imported.
-
It does not replace your need for a second backup if you want maximum safety.
Why iCloud Is Ideal for Beginners
Long-term iPhone owners often explain that after enabling iCloud Photos, they never returned to manual backups because the system quietly performs updates in the background, removes the stress of managing files, and ensures that even if the phone suddenly stops functioning, their entire library is preserved.
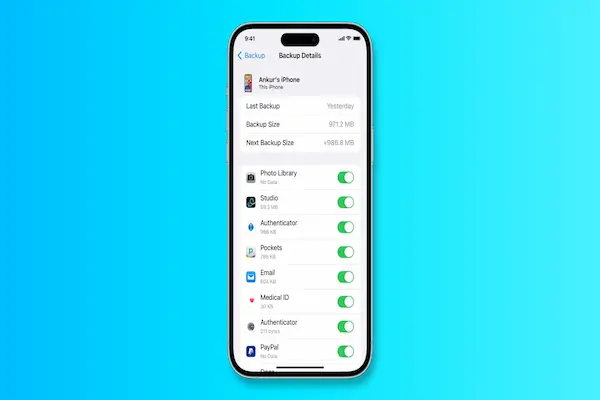
2. How to Check Whether iCloud Photos Is Already Enabled
Some iPhones activate iCloud Photos when the user first signs in to their device, which means your photos may already be syncing without you knowing. Because of this, a quick check prevents unnecessary worry.
Step-by-Step: Verify iCloud Photos Status
-
Open the Settings app.
-
Tap your Apple ID name at the top of the screen.
-
Select iCloud.
-
Tap Photos.
-
Look for the switch labeled iCloud Photos.
-
If the switch is green, iCloud Photos is enabled.
-
If the switch is gray, it is turned off.
-
If the iPhone displays a message such as “Updating” or “Syncing,” the backup is in progress.
Signs That Sync Is Already Working
-
You see identical photos on your iPhone and iPad.
-
New photos show up on iCloud.com when checked from another device.
-
You receive notifications about optimizing storage or your iCloud storage being full.
Understanding your current status prevents confusion in the following steps.
3. Turn On iCloud Photos (The Safest, Easiest Method for Beginners)
Activating iCloud Photos is the core of the process, and doing it correctly gives you peace of mind for years.
How to Enable iCloud Photos
-
Open Settings.
-
Tap your Apple ID.
-
Select iCloud.
-
Tap Photos.
-
Turn on iCloud Photos.
-
Choose between the two storage options described below.
Choose Your Storage Setting Carefully
You will see two important options:
1. Optimize iPhone Storage
-
The iPhone will keep smaller, space-saving versions of photos on the device.
-
Full-resolution originals remain stored safely in iCloud.
-
The phone automatically downloads originals when needed.
-
Recommended for users with limited storage.
2. Download and Keep Originals
-
The device keeps full-resolution copies locally and in the cloud.
-
Requires significantly more storage space on the iPhone.
-
Useful if you edit large files or need offline access at all times.
What Happens After You Turn It On
-
The iPhone starts uploading your entire library quietly in the background.
-
Large videos may take longer to sync than photos.
-
You must stay connected to Wi-Fi for the fastest upload speeds.
-
The device may pause backup when the battery is low.
Turning on this feature is safe and reversible, but you should allow time for initial upload, especially if you have thousands of images.
4. Understand iCloud Storage and How Much You Really Need
Many users panic when they see “iCloud storage full,” but this simply means the backup stopped temporarily and the solution is straightforward.
Check Your Storage
-
Open Settings.
-
Tap your Apple ID.
-
Select iCloud.
-
View the color bar showing used and available space.
What Takes Up Space
-
Photos
-
Videos
-
Device backups
-
WhatsApp or iMessage attachments
-
App data synced across devices
-
Documents stored in iCloud Drive
How Much Space iCloud Photos Commonly Requires
-
Light user (1,000–2,000 photos): around 5–15 GB
-
Moderate user (5,000–10,000 photos): around 20–60 GB
-
Heavy user (20,000+ photos plus videos): 200 GB or more
Space-Saving Tips Without Losing Anything
-
Remove repeated screenshots.
-
Clear downloaded files in message apps.
-
Delete old screen recordings.
-
Empty the Recently Deleted album after confirming backup.
-
Offload unused apps (does not delete photos).
Understanding storage prevents frustration and helps you maintain a clean backup environment.
5. How to Confirm Your iPhone Photos Are Actually Backed Up
No backup guide is complete without verification steps, because nothing matters more than confirming your photos truly exist somewhere safe.
Verification Checklist
-
Check that iCloud Photos is on.
-
Scroll through recent photos and look for the small loading icons.
-
Connect to Wi-Fi and plug in your phone, then wait a few minutes.
-
Open another Apple device signed into the same Apple ID—your photos should appear.
-
Open the Photos app and check whether the bottom message says “Updated Just Now.”
-
Confirm that important videos appear in the cloud as well.
Signs That Sync Is Incomplete
-
You see “Syncing…” at the bottom of the Photos app.
-
Some thumbnails appear blurry or low resolution.
-
A spinning icon appears under video files.
-
You find large videos missing on other devices.
Once everything looks identical on both devices, backup is confirmed.
6. Alternatives to iCloud Photos (Optional but Useful)
Although iCloud Photos is the simplest option, some people prefer having a second backup for peace of mind, or they want an offline method for long-term archiving.
A. Backup via Computer Using a Cable
-
Connect the iPhone to a Mac or PC using a USB cable.
-
Open the Photos app on Mac or the file explorer tools on Windows.
-
Import all photos and videos into a folder on your computer.
-
Wait for the process to finish fully before disconnecting.
-
Store the backup on an external hard drive for extra safety.
Advantages
-
Does not rely on internet.
-
Allows extremely large video backups.
-
Offers a second layer of protection.
Disadvantages
-
Must be done manually.
-
Requires careful organization to avoid duplicates or lost files.
-
Does not offer real-time sync.
B. Backup Using Third-Party Cloud Services
Some users prefer additional storage platforms (names removed as per instructions).
Most of these tools function by automatically uploading images from the camera roll.
Why Some Users Use Both iCloud and Another Backup
-
One service acts as a real-time sync.
-
The second acts as a long-term archive.
-
This mirrors the well-known “3-2-1” backup method (three copies, two types of storage, one off-site).
7. Keep Your Apple ID Safe (Critical for Photo Backup)
Because iCloud Photos syncs through your Apple ID, protecting the account is just as important as backing up the photos.
Account Safety Checklist
-
Use a strong, unique password.
-
Turn on two-factor authentication.
-
Keep your recovery phone number updated.
-
Never share your Apple ID with others.
-
Store recovery codes securely.
Why This Matters
If someone gains access to your Apple ID, they gain access to your photos.
If you lose access to your Apple ID, you may temporarily lose access to your iCloud Photos until account recovery completes.
8. A Clear Step-by-Step Routine for Beginners
Daily
-
Take photos normally—iCloud handles everything automatically.
-
Connect to Wi-Fi at least once per day so syncing continues smoothly.
Weekly
-
Check the Photos app for sync messages.
-
Review your storage and delete unnecessary screenshots or duplicates.
-
Charge the phone while connected to Wi-Fi to allow background uploading.
Monthly
-
Review your iCloud storage bar for warnings.
-
Make a cable backup if you recently captured important events.
-
Confirm that the Recently Deleted album is empty; clearing it frees space.
Quarterly
-
Export high-value photo collections to an external drive.
-
Review old albums and reorganize for clarity.
-
Check your Apple ID security settings.
This routine ensures your photos stay protected without any stress.
9. Fast Troubleshooting for Common Issues
If Sync Is Stuck
-
Connect to strong Wi-Fi.
-
Plug the iPhone into power.
-
Restart the device.
-
Open Photos and leave it open for several minutes.
If iCloud Storage Is Full
-
Remove unnecessary backups of old devices.
-
Delete large files inside iCloud Drive you no longer need.
-
Review video sizes—videos consume massive space.
-
Consider adjusting storage settings.
If Photos Disappear Temporarily
-
Check Recently Deleted.
-
Confirm you are signed into the correct Apple ID.
-
Ensure iCloud Photos is enabled again after an update or reset.
10. Quick Summary Checklist (Save or Print)
Before Enabling Backup
-
Check Apple ID is correct.
-
Confirm Wi-Fi connection.
-
Ensure battery is above 30% or connect to charger.
-
Verify available iCloud storage.
Activating Backup
-
Turn on iCloud Photos.
-
Choose Optimize or Download Originals.
-
Stay connected to Wi-Fi during upload.
After Backup
-
Verify photos on another Apple device.
-
Review storage occasionally.
-
Set a monthly habit to re-check sync.
Final Thoughts
Backing up iPhone photos does not need to be confusing, stressful, or technical, especially when you follow a slow, supportive set of steps that explain not only what to press but why each option matters. Once iCloud Photos is enabled and you confirm that everything syncs properly, you gain long-term peace of mind because your memories no longer depend on one fragile device. With continued safe habits—checking storage, securing your Apple ID, and occasionally creating a second backup—you ensure that your images remain safe for years.