Using only one screen for studying, working, editing documents, or attending online meetings can feel limiting very quickly, especially when you need to switch between apps, compare files, read references while writing, or keep communication tools open without hiding your main task.
Connecting an external monitor is one of the simplest ways to increase productivity and comfort, yet many users delay doing this because they are unsure about cables, ports, display modes, resolution settings, or what options to choose when the image finally appears.
This complete guide on how to setup external monitor was created for students and professionals who want more screen space without stress, explaining everything step by step in a clear, visual, and practical way, whether you use Windows or macOS.
Throughout this article, you will learn how to connect a second screen physically, how to choose the right cable, how to configure display settings, how to understand the difference between mirroring and extending the desktop, how to adjust resolution and scaling, and how to organize windows efficiently across two monitors.
The objective is to help you transform your workspace into a more comfortable and productive environment, without technical confusion or unnecessary trial and error.
Why Using an External Monitor Makes a Big Difference
Before going into cables and settings, it helps to understand why so many people consider a second screen one of the most impactful upgrades for daily computer use.
An external monitor gives you more visual space, which reduces constant window switching and allows your brain to focus better on the task at hand.
Main Benefits of a Second Screen
- More space for multitasking.
- Less time switching between windows.
- Better posture with proper screen height.
- Improved focus and workflow.
Once configured, many users never go back to a single screen.
Understanding What You Need Before Connecting
Setting up an external monitor does not require advanced equipment, but checking a few basics beforehand prevents frustration.
Basic Requirements
- A computer with video output.
- An external monitor.
- A compatible cable.
- Power supply for the monitor.
Most modern computers already support external displays.
Common Types of Video Cables Explained Simply
Choosing the right cable is one of the most common sources of confusion, because monitors and computers may have different ports.
Most Common Video Cables
- HDMI.
- DisplayPort.
- USB C.
- VGA.
HDMI is the most common and easiest option.
HDMI Cable
- Widely supported.
- Good image quality.
- Carries audio and video.
Ideal for most users.
USB C for Displays
- Common on modern laptops.
- Supports video and power.
Often used with adapters.
DisplayPort
- Popular on desktops.
- Excellent for high resolution.
Less common on older laptops.
Checking Ports on Your Computer and Monitor
Before buying or connecting a cable, look carefully at the ports available on both devices.
Where to Check Ports
- Sides or back of laptop.
- Back of desktop computer.
- Back of monitor.
Matching ports avoids adapters.
Step by Step: Physically Connecting the External Monitor
The physical connection is straightforward once the correct cable is chosen.
Connection Steps
- Turn off or sleep the computer.
- Plug the monitor into power.
- Connect the video cable to the monitor.
- Connect the other end to the computer.
- Turn everything on.
Most systems detect the monitor automatically.
What to Do If Nothing Appears on the Screen
Sometimes the monitor does not show an image immediately, which is usually easy to fix.
Quick Checks
- Confirm the monitor is on.
- Select the correct input source.
- Check cable connections.
Input selection is often the issue.
Understanding Display Modes: Mirror vs Extend
Once the monitor is detected, the system asks how you want to use it.
This choice defines how both screens behave.
Main Display Modes
- Mirror display.
- Extend desktop.
Each mode serves a different purpose.
Mirror Display Mode Explained
Mirroring shows the same image on both screens.
When Mirror Mode Is Useful
- Presentations.
- Teaching or demonstrations.
- Sharing content with others.
Not ideal for multitasking.
Extend Desktop Mode Explained
Extending the desktop creates one large workspace across both screens.
Why Extend Mode Is Preferred
- Independent windows on each screen.
- Better multitasking.
- More productive workflow.
This is the most common choice.
How to Choose Display Mode on Windows
Windows offers simple controls for display modes.
Steps to Select Display Mode
- Right click on desktop.
- Select Display settings.
- Find Multiple displays.
- Choose Extend or Duplicate.
Changes apply instantly.
How to Choose Display Mode on Mac
macOS makes display options visual.
Steps to Select Display Mode
- Open System Settings.
- Go to Displays.
- Choose Extend or Mirror.
The layout is shown graphically.
Arranging Screens Correctly
Correct arrangement ensures the mouse moves naturally between screens.
Why Arrangement Matters
- Smoother cursor movement.
- Less confusion.
How to Arrange Screens
- Open display settings.
- Drag screens to match physical layout.
Match left and right positions.
Choosing the Main Display
The main display shows the taskbar or menu bar.
How to Set Main Display
- Select preferred screen.
- Mark as main display.
Usually the external monitor is preferred.
Adjusting Screen Resolution
Resolution defines how sharp and large content appears.
Why Resolution Matters
- Incorrect resolution looks blurry.
- Text size may feel uncomfortable.
How to Adjust Resolution
- Open display settings.
- Select the monitor.
- Choose recommended resolution.
Recommended values are safest.
Understanding Scaling and Text Size
Scaling adjusts how big text and interface elements appear.
When to Adjust Scaling
- Text feels too small.
- Icons are hard to see.
Scaling improves comfort without reducing resolution.
Matching Brightness and Colors
Different monitors may look brighter or warmer.
Why Color Matching Matters
- Reduces eye strain.
- Creates visual consistency.
Basic adjustments help a lot.
Audio Settings With External Monitors
Some monitors include speakers.
Checking Audio Output
- Open sound settings.
- Select correct output device.
HDMI often changes audio automatically.
Using Two Screens Efficiently
Having two screens only helps if you use them intentionally.
Common Two Screen Layouts
- Main work on one screen.
- Reference material on the other.
This reduces constant switching.
Practical Window Organization Examples
For Studying
- Video lecture on one screen.
- Notes on the other.
For Work
- Email and chat on one screen.
- Main task on the other.
Clear separation improves focus.
Keyboard Shortcuts for Managing Windows
Shortcuts make multitasking smoother.
Useful Habits
- Snap windows to edges.
- Move windows between screens.
These features save time.
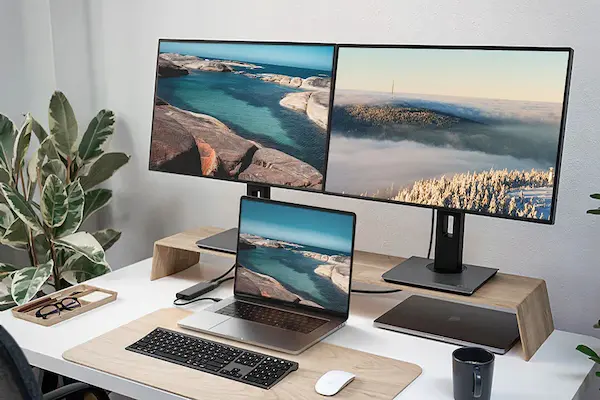
Laptop With External Monitor Setup Tips
Laptops benefit greatly from external screens.
Recommended Setup
- External monitor at eye level.
- Laptop used as secondary screen.
This improves posture.
Using the Laptop With Lid Closed
Some users prefer using only the external monitor.
Things to Consider
- External keyboard and mouse needed.
- Proper ventilation.
This creates a desktop like setup.
Troubleshooting Common External Monitor Issues
Monitor Detected but Blank
- Check input source.
- Adjust resolution.
Wrong Screen Order
- Rearrange displays in settings.
Blurry Image
- Check resolution.
- Disable scaling issues.
Most issues are configuration related.
Practice Exercise: Setting Up Your External Monitor
Exercise 1: Physical Setup
- Connect cable.
- Power on monitor.
Exercise 2: Display Configuration
- Select extend mode.
- Arrange screens.
Exercise 3: Workspace Organization
- Place apps intentionally.
Practice builds confidence.
Frequently Asked Questions About How to Setup External Monitor
Can I use different resolutions on each screen?
Yes, each monitor has independent settings.
Does an external monitor slow down the computer?
Usually no, for normal tasks.
Is one cable better than another?
HDMI is sufficient for most users.
Final Thoughts and a Practical Next Step
Learning how to setup external monitor is one of the most effective ways to improve productivity, comfort, and focus for both students and professionals, because extra screen space reduces mental load and allows tasks to flow more naturally.
When you understand how to connect the monitor, choose the correct display mode, adjust resolution and scaling, and organize windows intentionally, working with two screens becomes intuitive and enjoyable instead of confusing.
Could you take a few minutes today to connect an external monitor, switch to extend mode, and arrange your most used apps across both screens, just to experience how much smoother your workflow can feel with the right setup?